display
Deutsch   English   

2. LED DISPLAY


YOU LEARN HERE...


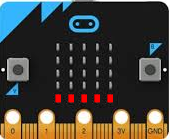
how to use the LED display to show text messages and simple images.
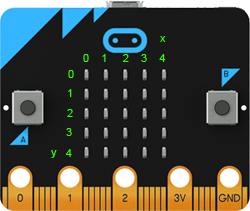


25 LEDs


The 25 LEDs of the display are arranged in a 5x5 matrix and can be addressed individually via their x and y position. With

display.set_pixel(x, y, n)

the LED at position x, y lights up with brightness n, where n is a number from 0 to 9. The LED is brightest for n = 9 and switched off for n = 0.

You can switch off all LEDs with isplay.clear()


EXAMPLES


Switching LEDs on and off

Your programme should switch the LEDs in the middle row on and off in sequence. The command sleep(400) stops the programme for 400 milliseconds. This means that the LED that is currently lit remains switched on during this time.


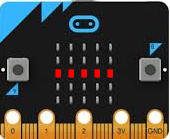
Program:

from microbit import *

for x in range(5):
    display.set_pixel(x, 2, 9)
    sleep(400)
    display.set_pixel(x, 2, 0)
► Copy to clipboard
To teach you how to programme with random numbers, in this example a randomly selected LED is to be repeatedly switched on and off. In the randomLed() function, all LEDs are first deleted and then two numbers between 0 and 4 are selected and the LED with these coordinates is switched on with maximum brightness.  

In the main programme, the randomLed() function is called in an endless loop every 200 milliseconds. The programme therefore runs until you download a new programme, press the reset button (button next to the USB port) or disconnect the power supply.

Program:

from microbit import *
from random import randint

def randomLed():
    display.clear()
    x = randint(0, 4)
    y = randint(0, 4)    
    display.set_pixel(x, y, 9)

while True:
    randomLed()
    sleep(200)  
► Copy to clipboard


Display images

The microbit module contains several 5x5 pixel images that you can show on the display. You can see the image names in the Dokumentation.

You can display these images using the display.show() function. In this example, arrows pointing north, east, south and west are displayed in sequence.


Each image is displayed for 1 second. Repeat the process three times with a for loop.

Program:

from microbit import *

for i in range(3):
    display.show(Image.ARROW_N)
    sleep(1000)
    display.show(Image.ARROW_E)
    sleep(1000)
    display.show(Image.ARROW_S)
    sleep(1000)
    display.show(Image.ARROW_W)
    sleep(1000)
► Copy to clipboard


Create your own images

You can also create your own images by specifying a string as a parameter of Image, which consists of 5 blocks with 5 numbers 0 to 9 each. The blocks correspond to the individual lines. The numbers define the brightness in the range 0 (dark) to 9 (very bright).
The following programme shows a square with the border pixels at full brightness.


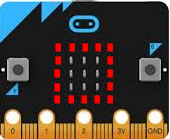
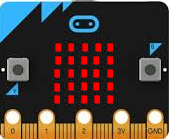
Program:

from microbit import *

img = Image('99999:90009:90009:90009:99999:')
display.show(img)
► Copy to clipboard


REMEMBER YOU...


To control the LED display, use the display object with the functions set_pixel(), show(), scroll() and clear(). The best way to find out about the permitted parameters is in the TigerJython menu under Help | APLU documentation | micro:bit | MicroPython API.


TO SOLVE BY YOURSELF


1.
Write a programme that displays four diagonal arrows one after the other:
Image.ARROW_NW
Image.ARROW_NE
Image.ARROW_SW
Image.ARROW_SE
 

2.

With a double for loop

for y in range(5):
    for x in range(5):
        display.set_pixel(x, y, 9)
        sleep(400)

you can switch on all LEDs one after the other. The LEDs should then all be switched off simultaneously with the clear() command 1000 milliseconds after the last LED has been switched on.

3. write a programme that first switches on the top row of LEDs, then the second, third and so on. Let the process run in an endless loop.